Help Center
Advanced personalisation
4.5 out of 5 stars
| 5 Stars | 0% | |
| 4 Stars | 100% | |
| 3 Stars | 0% | |
| 2 Stars | 0% | |
| 1 Stars | 0% |
You can personalise Touchdown to your needs, this article explains personalisation of recipient statistics, email campaigns view and email templates view and automation.
Recipient statistics
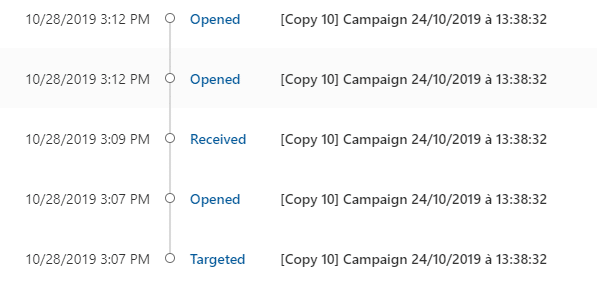
These type of statistics is shown in each recipient based on the entity you use. For example, you will gain an overview of each particular lead that was targeted with an email campaign, clicked on an email campaign, received an email campaign and so on, in a form of a timeline. You can also observe each recipient’s reactivity in terms of percentage of opens and clicks from how many received emails.
Recipient timeline
You can also add a timeline (as shown on the image) showing all the interactions of each recipient with your email, SMS and automated communication. To add the timeline you need to modify the recipient’s form.
To do so:
- In Dynamics, go to Settings > Advanced Settings > Customisations > Customise the System
- Under Components > Entities
- Select the entities you want to have the timeline (e.g. “Contact”) and open to click Forms
- Click Contact > Insert tab > Sub-Grid
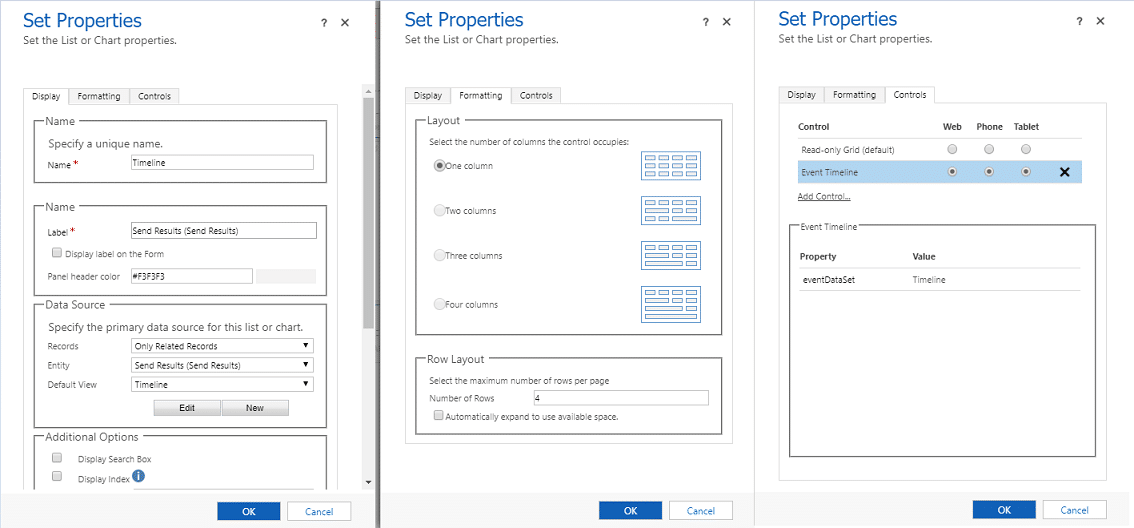
The Set Properties window opens with three tabs you need to adapt.
In the Display tab:
- In the Name put Timeline
- In the Label put Timeline – unless you prefer a different label in your interface
- In the Entity select Touchdown Send Results (Contact)
- In the default view select Timeline
- Confirm OK
In the Formatting tab:
- Select One column
- In the Number of rows put 4
- Confirm OK
In the Controls tab:
- Click Add control
- Select Event Timeline
- Click Add
- Click on the radio buttons to set the Event Timeline view by default on the Web, Phone and Tablet
- Confirm OK
All the tabs are shown in the image below.


4.5 out of 5 stars
| 5 Stars | 0% | |
| 4 Stars | 100% | |
| 3 Stars | 0% | |
| 2 Stars | 0% | |
| 1 Stars | 0% |
