Help Center
In this article
Setup
4.2 out of 5 stars
| 5 Stars | 67% | |
| 4 Stars | 0% | |
| 3 Stars | 0% | |
| 2 Stars | 33% | |
| 1 Stars | 0% |
Register your environment
Before starting the installation, please contact your administrator to ensure that you have access as an Active Directory administrator.
- Go to https://setup.touchdown.ms/
- Click on Login and log in with your Azure Active Directory administrator access
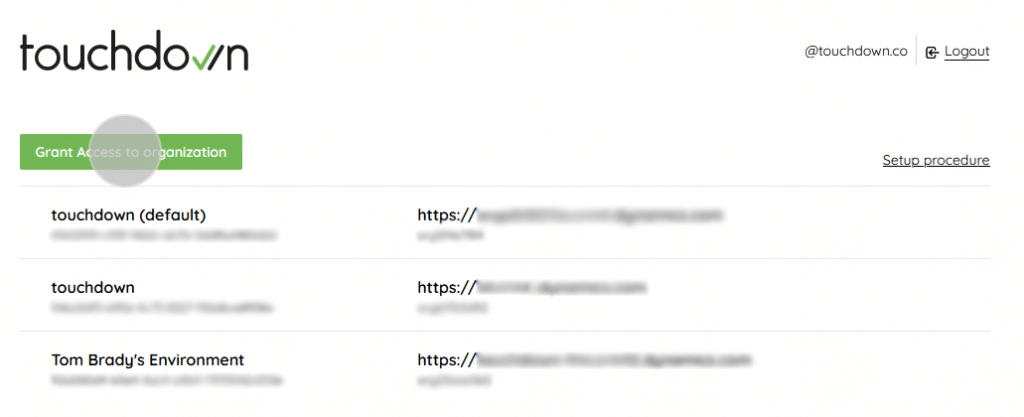
- If this is your first time logging in with this type of access, you must click the green button Grant access to Organisation to allow Touchdown to communicate with your Dynamics 365 CRM
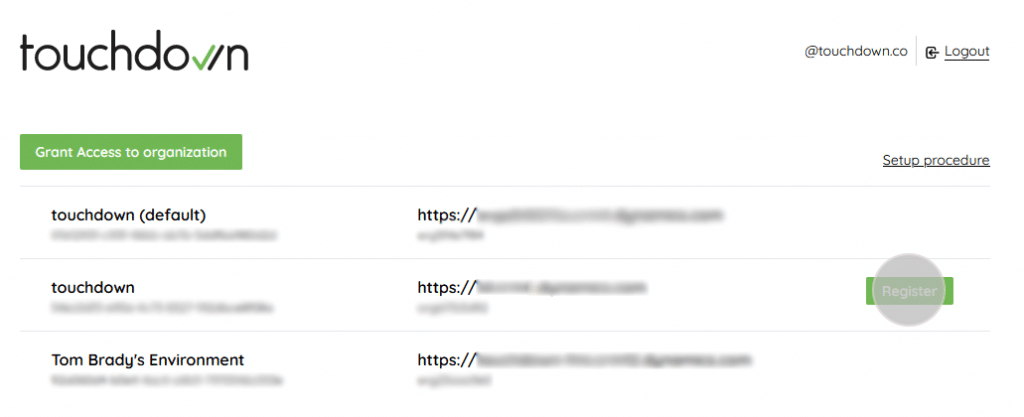
- Select the instance you want to install Touchdown on by clicking on Register. This allows us to create your Touchdown account for sending your communications

Import the solution
A file containing the Touchdown solution will be provided to you by our Customer Service.
In your Dynamics environment:
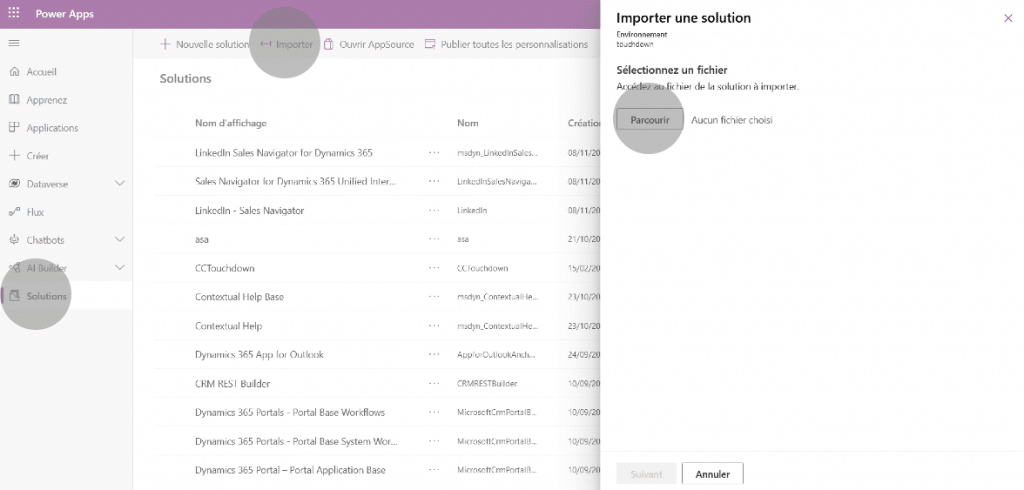
- Connect to https://make.powerapps.com/
- Select your environment on the top right
- In the menu, click on Solutions
- Import the solution by clicking on Import
- Select the .zip file provided
- Sélectionnez le fichier .zip fourni
- Click on Next and then import the solution by clicking on Import
- Follow the progress via View history
Create a Touchdown Application User
Now you need to create a new user and assign rights to ensure Touchdown works properly.
In the Power Platform administration :
- Connect to https://admin.powerplatform.com/
- In the menu, click on Environments
- Click on the environment where Touchdown is installed
- In the ribbon, click Settings
- Open to Users + Permissions and click Application Users
- In the ribbon, click + New Application User. A box will appear on the right hand side of the screen.
- Click + Add Application and copy c37a5b3b-185f-4a8b-9712-1e4dda04b2eb into the Application ID field. Select Touchdown API
- Select the Business Unit
- Click on the pen to add the role, check “System Administrator“
- Confirm by clicking Create

Configure the entities
Access the Touchdown solution to configure entities
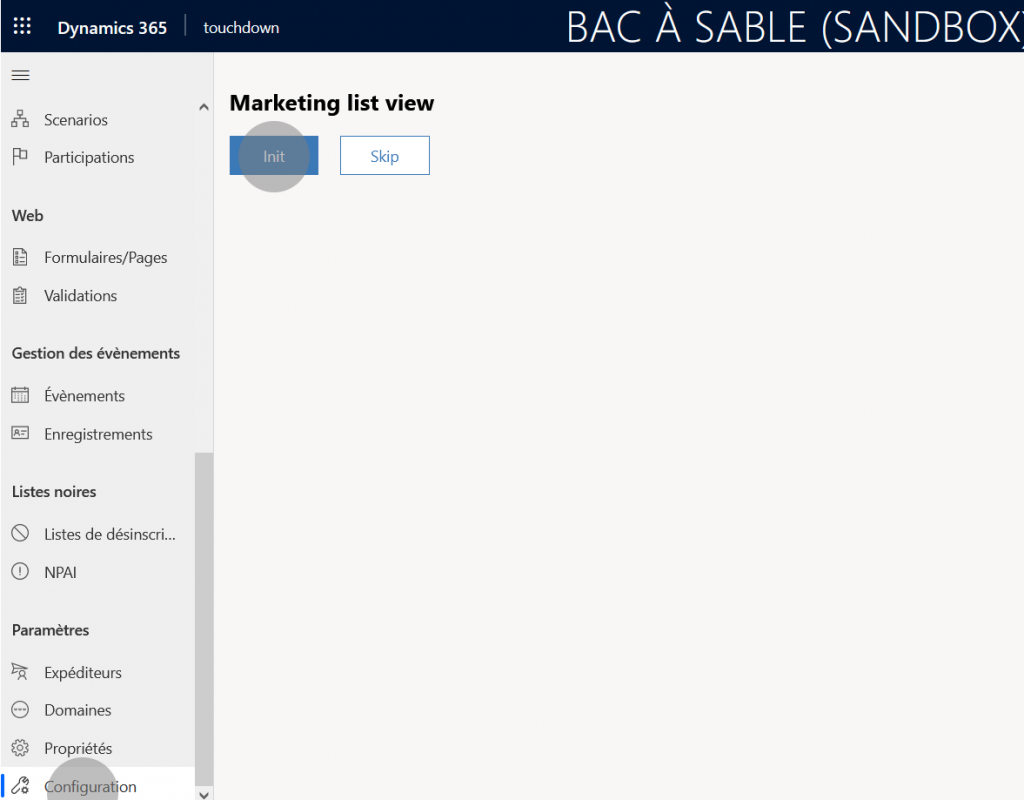
- At the bottom of the menu, click on Configuration
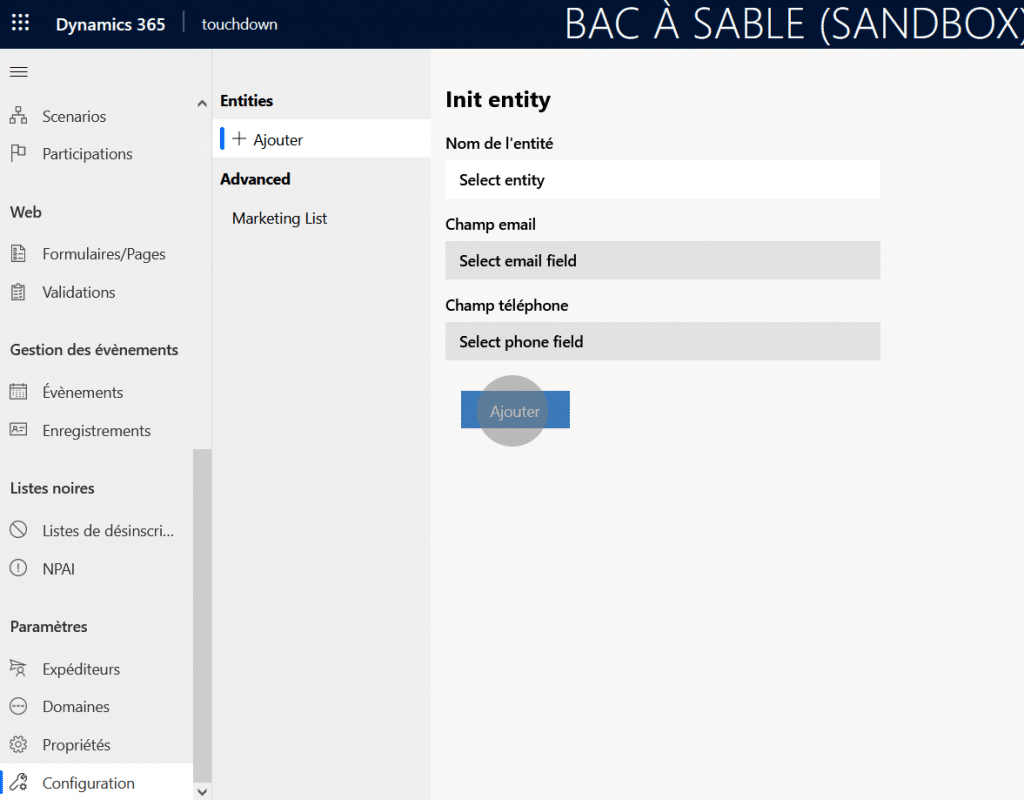
- Click on the Init button to initialize the Marketing lists with Touchdown (create relationships with the different entities)
- Configure one by one the entities you will use to send your communications (Contact / Lead / Account / Custom Entity)
- Select the entity
- Select the entity field where the email address is stored
- Select the entity field where the mobile phone number is stored
- Click on the Add button
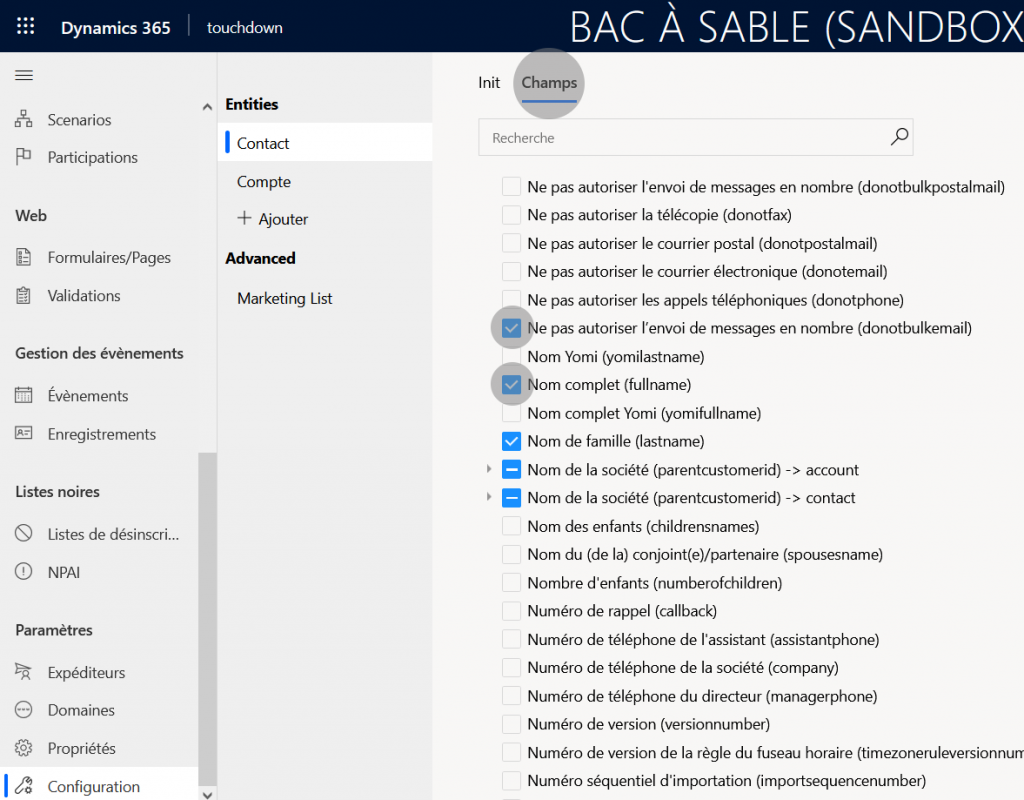
- A Fields tab appears. Check the boxes of the fields you want to use to personalize your messages or to create your forms (the fields of the N>1 associated entities are also available)
- Repeat these steps for each entity
Was this article helpful?
4.2 out of 5 stars
| 5 Stars | 67% | |
| 4 Stars | 0% | |
| 3 Stars | 0% | |
| 2 Stars | 33% | |
| 1 Stars | 0% |
